Oct 05, 2022
 925
925
In order to get your Register Workstation set up, follow the steps listed below.
Register Set up
To get the KlickTrack Register App:
- Power on the iPad.
- Navigate to the App Store and download the KlickTrack App (not the KlickTrack Scanner App)
- Open the KlickTrack App.
- Log in using your KlickTrack credentials.
- Select your shop's location.
- Enter the device nickname.
- Select the device's primary use - Register.
- Select Submit.

KlickTrack Scanner Set Up
To download and register the scanner app:
- Power on the iPhone or iPod.
- Navigate to the App Store and download the KlickTrack Scanner 3.0 App.
- On your back office device, navigate to KlickTrack Dashboard > Hardware Management > Devices
- Create a new scanner device by clicking on the blue plus sign in the device section, and filling in the fields on the modal for scanner device registration
- Locate your scanner device in the device list, and then click on the device to re-open the registration modal.
- Locate the scanner registration code on the re-opened modal, it will be denoted in green
- Open the KlickTrack Scanner App on your scanner device, and input the registration code to the app.
Your scanner is now registered.
Note: Sign in to the App Store from your device using the Apple ID that was used to obtain KlickTrack for your shop.
To connect your scanner to a register drawer:
- On your register device, go to the register homepage and click on the scanner icon in the upper right corner. This will open a modal with a QR Code.
- On your scanner device, click on "Link a drawer"
- Scan the QR code on the register screen with your scanner
Your drawer is now connected.
For more information on how to download, set up, and connect your scanner please see our article here.
Printer Set up
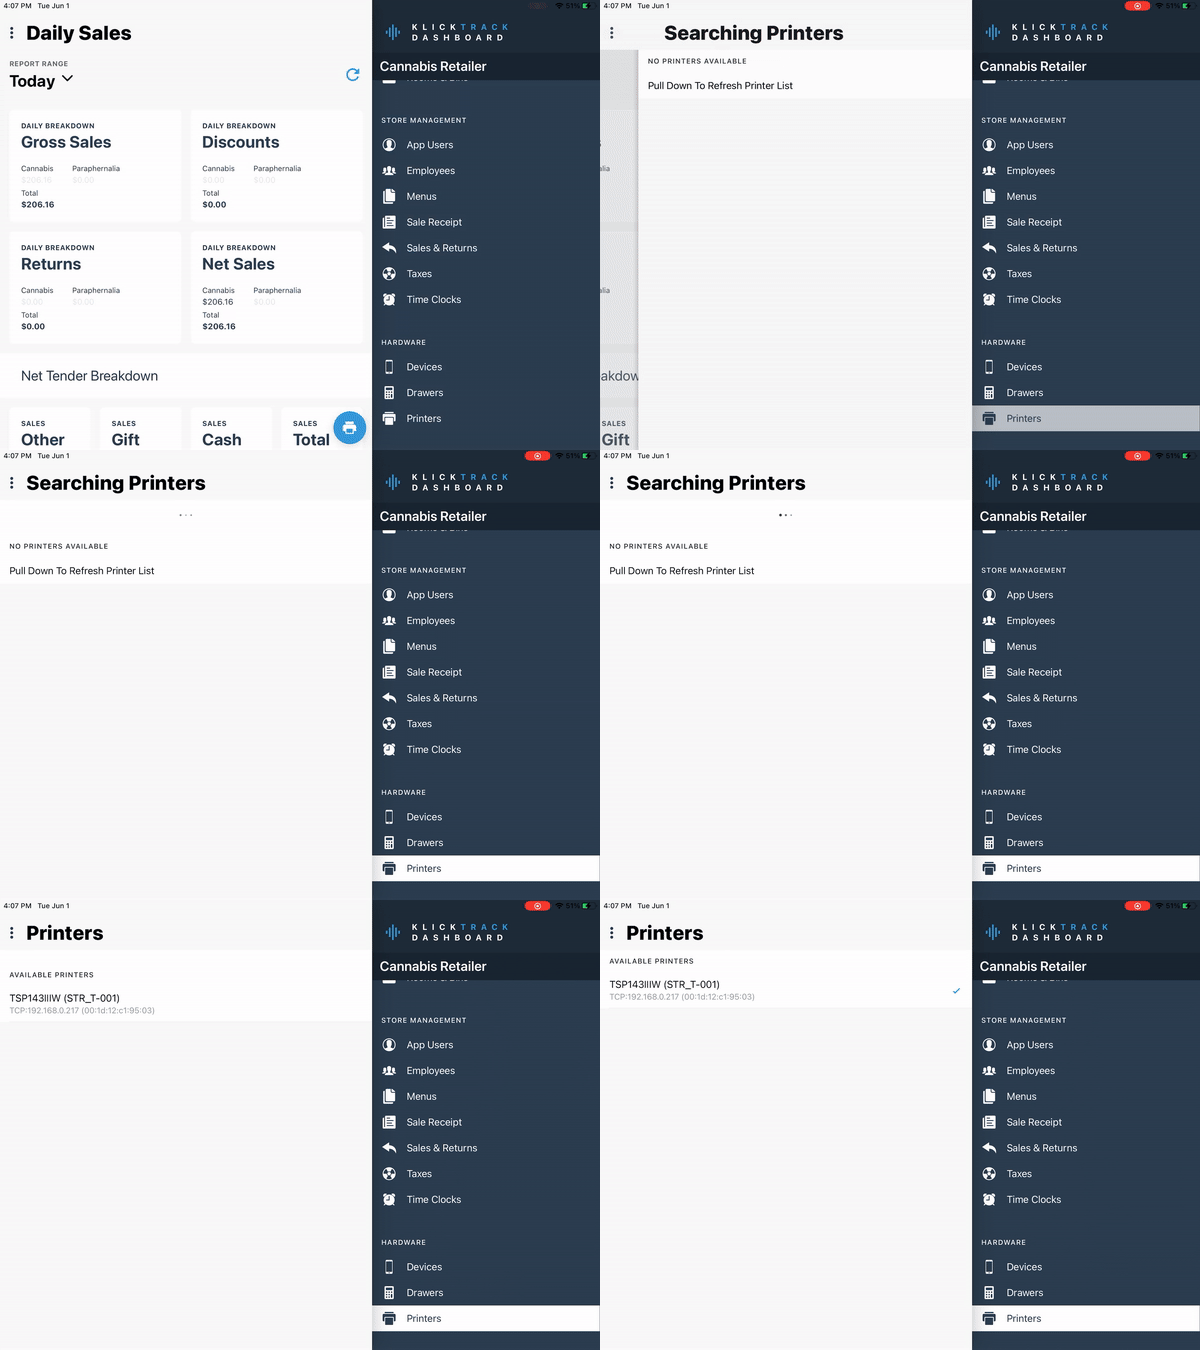
To connect a new printer:
- Connect the printer to the same wifi network as the registers.
- (Only if applicable) Enable Bluetooth on the iPad and pair it with a new printer.
- Open Control Panel on the register.
- Select Printers.
- Pulldown to refresh the available printer list.
- Choose the new printer.
- Choose printer model.
- Select OK.

PRO TIP: Use the test print feature in the Active Drawer tab of the Control Panel to confirm that the printer has been successfully connected.
Cash Drawer Set Up
To connect a cash drawer to the receipt printer:
- Complete printer set up prior to setting up the cash drawer.
- Connect the cash drawer to the printer via the cable provided with the cash drawer.
NOTE: The cash drawer is connected and powered by the printer. Depending on how you have your App Settings set up, will determine when the cash drawer opens.


